This course is structed so that every section is a new scene that we create. With every scene created you will learn more about the scene creation process
This course is project based so we will be making an awesome project with each section!
The 10 scenes we will create are the following:
Living Room
Surreal Landscape
Sci-Fi Spaceship Hangar
Underwater Coral Reef
Ancient Ruins
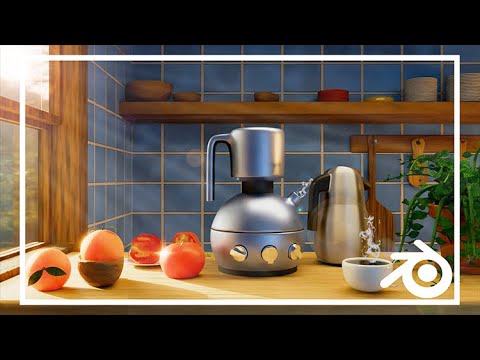
Kitchen Product Visualization
Medieval Castle Courtyard
Magical Forest
Animated CartoonCharacter
Futuristic Cityscape
Living Room
In this one we will learn how to quickly block out our scene & create it with proper scale & measurement. We’ll learn how to make the materials for the scene, using geometry nodes hair for the carpet, how to setup a dust particle system, lighting & much more.
Surreal Landscape
With the surreal landscape we will learn how to quickly block out our scene with sculpting & then add more detail with the sculpting. We’ll learn about vertex painting, how to use geometry nodes to distribute items in your scene, using nodes to create the sky & much more
Sci-Fi Spaceship Hangar
In this scene we will start with modeling & blocking our scene. Then we will use geometry nodes to add Sci-Fi paneling, see how to create edgewear, learn how to make, rig & texture a quick astronaut character & more.
Underwater Coral Reef
Underwater scenes can be tricky but in this one we will tackle that. From creating the color & the material to it, making the ocean to creating the caustics for the ocean & more. Finally we will make fish & distribute them with geometry nodes.
Ancient Ruins
We’ll start with blocking out our scene as we usually do & then quickly dive into geometry nodes to create the stone pattern. We’ll learn how to make pillars, make & add vines & grass, texture our scene & render it out!
Kitchen Product Visualization
In this one we will learn & use some cool modeling techniques for the appliances of the kitchen. We’ll then move to more organic things such as making leaves, oranges & tomatoes. We’ll see how to make a cup of coffee using nodes, how to add steam & much more!
Medieval Castle Courtyard
With this medieval courtyard we will have fun with the modeling process & see how to use booleans to create the archways. We’ll be doing quite a bit of modeling & texture creation for this one and wrapping it up into a awesome final scene.
Magical Forest
We will see how to make mushrooms procedurally. How to create grass using geometry nodes hair system, distribute geometry nodes based on an image mask, use some volumetrics tricks & bring this magical forest to life!
Animated CartoonCharacter
This one is a bit different as we are making an animated cartoon character. We will make our character from scratch. Texture him. Rig him & animate him. We will then add sound & render out a final animated movie!
Futuristic Cityscape
With this futuristic cityscape we will see how to use AI to generate building textures. We will then create & distribute our buildings using geo nodes & create various things such as roads & bridges that displace our city around it as we move them.
In this course we will cover the workflow for creating scenes & along the way learn everything we need to be able to create awesome scenes. By the end you will be able to take what you learn and make your very own scenes in Blender.

